STEP 1
The first layer is the underlying text with a simple ice effect. Start out with your font on a simple background. I used a solid blue as a background to help work the font effects.
STEP 2
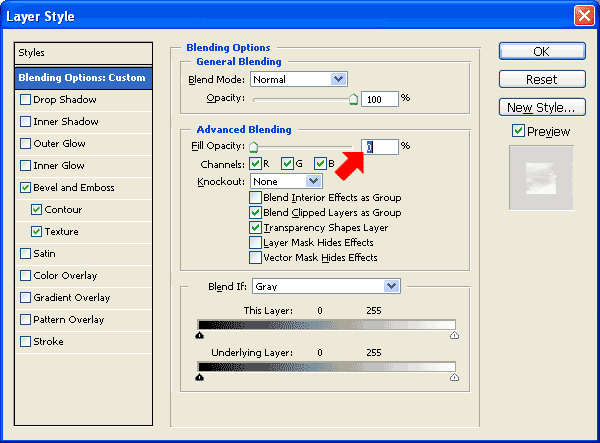
Next you'll add some pretty basic layer styles by double clicking the layer in the layer window (Layer>Layer Style>Blending Options
First set the Fill Opacity in the Blending Options tab. You can also adjust the layers Fill amount in the layer window, but since you're in the Layer Styles window its easy to do here.
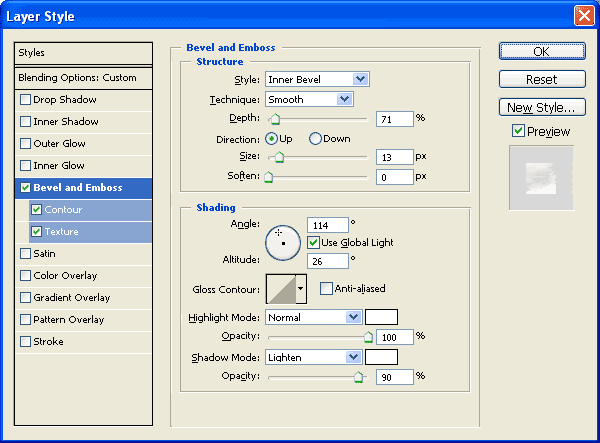
Add a bevel and emboss style. Use inner Bevel with Smooth technique. Set depth to about 75, direction Up, size approximately 13 with soften set to 0. The shading angle and altitude should be fine, but you'll need to adjust the highlight and shadow modes so the colors are white and the opacities are higher. Set Highlight mode to normal 100%, and Shadow mode to lighten at 90%.
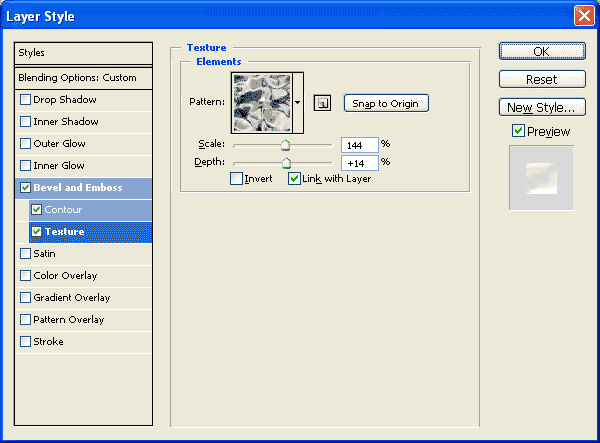
Here's what will make the basic frosted texture. Add a texture to the bevel and emboss style. Make it the Clouds pattern. Scale it down and set the depth low, about 15 should do.
STEP 3
Duplicate this layer so you have two text layers.
STEP 4
Open the layer styles for the duplicate text layer. Change the texture to the Satin pattern, adjust the scale to about 150 or by eye. This will add a cracked ice type pattern to the text.
STEP 5
Now we are going to add another layer to act as the frosted topping. Duplicate the text layer again so you now have three text layers. Remove or disable the layer effects on the new top text layer, set the fill opacity to 100 and change the color to white if it isn't already.
STEP 6
Hit the Q key to enter Quick mask mode and using a normal paint brush with soft edges, paint the area roughly you would like to frost.
Exit quick mask by hitting Q again, then inverse the selection (quick key Shift-Ctrl-I or menu Select>Inverse). Add a layer mask using this selected area.
Your text should resemble this.
STEP 7
On the third text layer with the now applied layer mask, select the layer mask thumbnail. Doing this will allow us to effect the layer mask without effecting the layer itself.
STEP 8
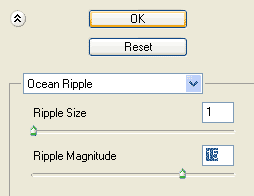
Apply two ocean ripple filters to the layer mask. Set the ripple size low and the magnitude high at about 15.
STEP 9
That concludes the basic frost text effect. If you want to continue on to learn how to add icicles, then continue to the next part of the tutorial.
STEP 10
Start out by adding a new empty layer.
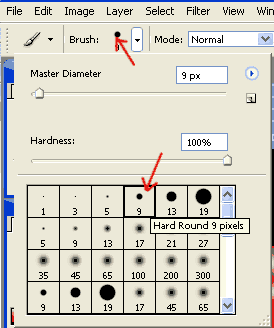
Now select a brush of appropriate size for the base of the icicle. In my case, I used the hard round brush of size 9.
STEP 11
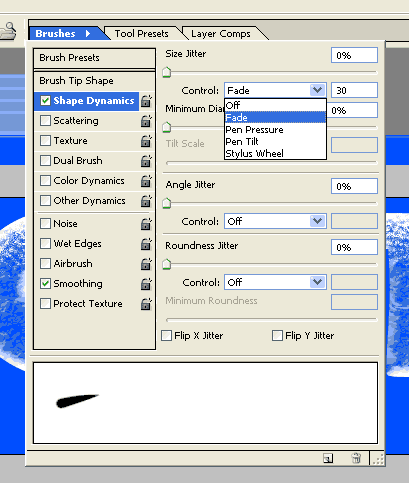
Now go to the brushes window (F5) and set the brush control to fade. The amount, which I set to 30, will depend on your text size, so try 30 and if its too short or too long, come back and change it.
STEP 12
On the black layer, start drawing icicle shaped lines using the brush tool (B). Since we are using a fade, the bush will quickly shrink to nothing making drawing icicles fairly easy.
To make the icicles simply select the bottom most text layer and copy the layer styles (right click Copy Layer Styles) then apply them to the icicles layer (right click on new icicle layer and Paste Layer Styles). |
And there you have it, a frosted, frozen, ice cubed text effect. An added bonus is that each layer is still a text layer, so if you wanted to change the text its relatively easy. |









No comments:
Post a Comment