You will learn how to create 3D Studio Max 3D text, and then how to import it into Photoshop to create a holiday text effect. You will see how to decorate your text with holiday themed items, and how to bring the composition together.

So to start off we will begin by opening up 3DS max and starting a new scene.

Once you have done that we can head over to the create toolbar on the right hand side of your screen. You will want to select the spline tab and then choose text as I have done in the below screen shot.
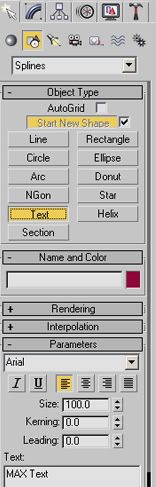
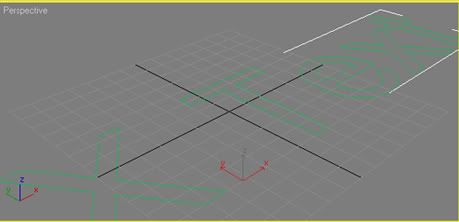
Now just drop it into your view port
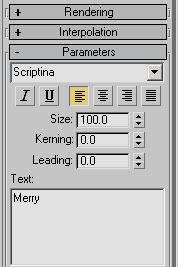
Once you have done this we can head back over to the modify tab and adjust our settings for our text. Here you can manipulate the font, size and kerning of your text. You can play with settings as you like for the tutorial but we will be using the following.
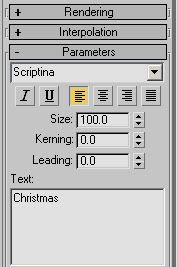
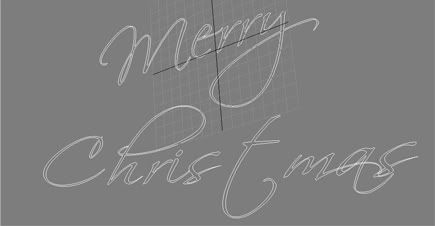
Now just repeat this process, this time using “Christmas” as your text.
My scene now looks like the below screen shot.
Now we can select the merry text again and head back over to our modifiers so we can make it three dimensional. Click the drop down on the modifier tab and choose bevel, once you have done that set yours up as mine is in the below screen shot.
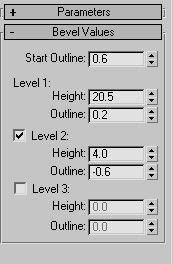
Now do the same thing for the Christmas text.

Our scene now looks like the below screenshot.

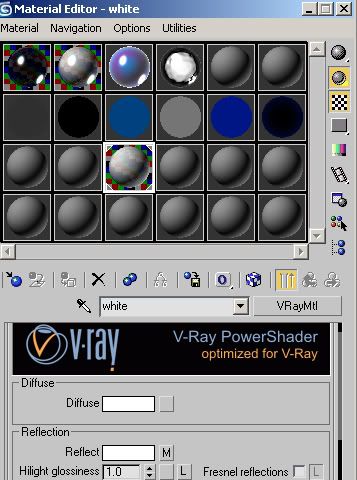
Now that our text is made its time to create a material for it, so go ahead and press m on your keyboard to open up the material editor so we can get started. Once your material editor is open just choose one of the orbs any orb will do and set the color diffuse up as white and your done. If you wanted something extra you could use a falloff map on your reflection section as I have done with my material below, butthis is not required and doesn’t have a very drastic effect on the final outcome.
My material:
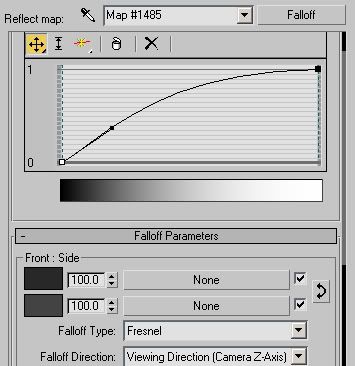
Which in turn looks like:

Now with your orb selected drag and drop it on top of your two 3D words, this should apply the material to your words.

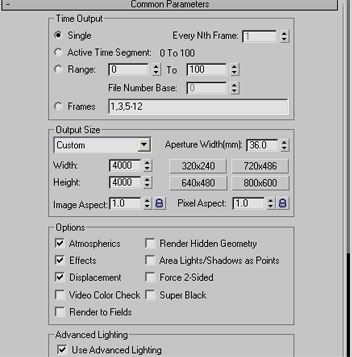
Once the material has been applied there’s not much left to do. We could apply some modifiers bend, taper or twist but its fine as is. So now let’s render, open up your render settings by pressing F10 on your keyboard and filling in your desired document size. I went with 4000*4000 but the size is really up to you and how large your final image will be.
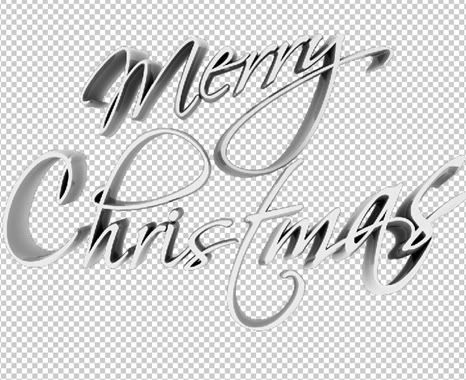
My render came out looking like the below screenshot.
Step 2: Text implementation and BG creation
Now its time to open up Photoshop, once it has opened, go ahead and create a new document at your desired size. I went with 3000*2000 but you can use whatever you like, be sure to keep your renders resolution in size when creating your document. Once you document has been created go ahead and fill this with black. Now using a large soft brush 300px soft draw on the canvas with white, try to create a quick spotlight like effect.
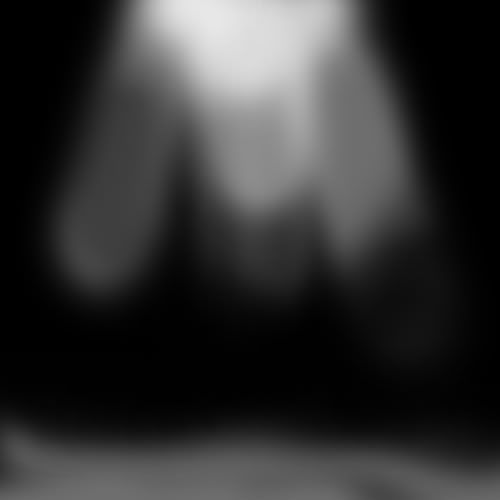
Once that is done apply a Gaussian blur with a radius of 250 px twice and drop your text in.

Now while holding CTRL on your keyboard click your text layer, this will make a selection around the text.

Now just go back to your background layer and copy the selection. Once that is done paste this over your text and set the blending mode to soft light at 50%. This in turn will cause the right hand sides of the text to become darker and the middle section to become brighter, making the text blend better with the scene.

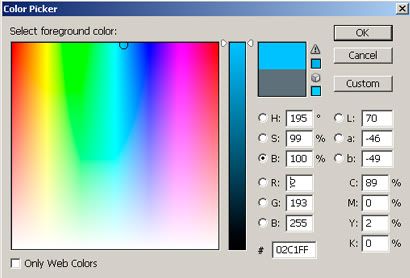
Once that is done its time to start the coloring. So grab a color of your choice I went with blue and drop it into a new layer under your text layer.
Set this layer up as an overlay layer at 100% opacity.

Now we will repeat this step only over the text, use the previously described method of making a selection around the text and then just fill on a new layer. Set this new layers opacity to about 25% and set the blending mode to overlay.

Now Download this light texture.
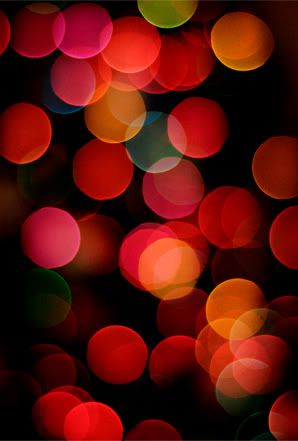
Put this layer on top of all the previous layers and set the opacity to 20% and the blending mode to screen.

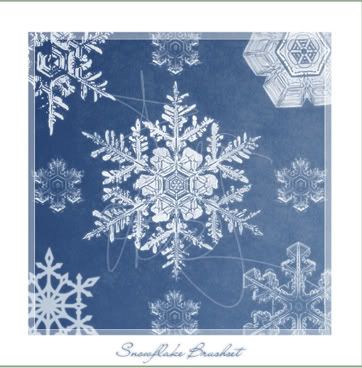
Now in the spirit of giving, we will be using a stock brush set provided by Meldir, she has graciously created these and allowed them for use, so a big thank you to her. Her snow flake brush set can be found here : http://photoshop-architect.blogspot.com/2011/09/snowflake-brush-set.html
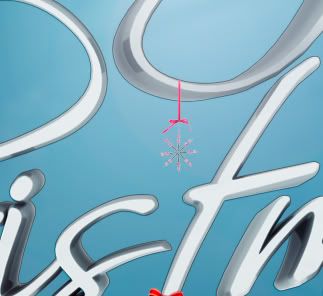
Once you have the brush set installed go ahead and make a new layer for our snowflakes. Now open up your brush editor and select one of the many beautiful snowflakes that you would like to use, once you have found one you prefer go ahead and set your brush up as mine is in the below screen shot.

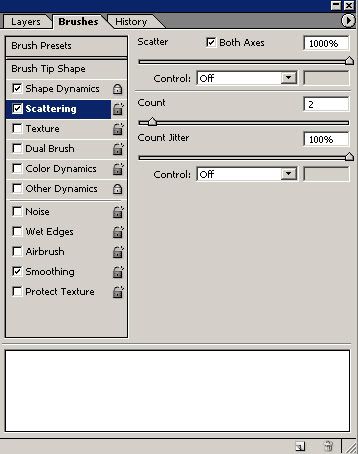

In doing this, we will make it so our brush will randomly plop out with various sizes and rotations, thus making the process much easier. Now go ahead and plop some snowflakes down on a new layer beneath your text. Once you have done that apply a slight Gaussian blur, a radius of about 4 should do.

Now repeat this process but this time we will not blur them. I kept mine small this time but you can use some big ones to if you like. Its your design and experimentation will only make it better.

Step 3: Christmas props
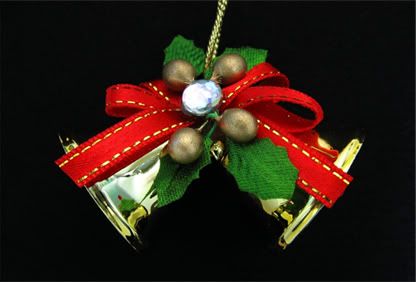
Now its time to start adding in all of those Christmas time stocks, ribbons, lights and ornaments we all be added in. Our first stock will be a bow/ribbon and can be found here : http://www.sxc.hu/pic/l/f/fa/fangol/1321208_58931672.jpg

Once you have the stock dropped into your new scene just isolate it out as you would any other stock.

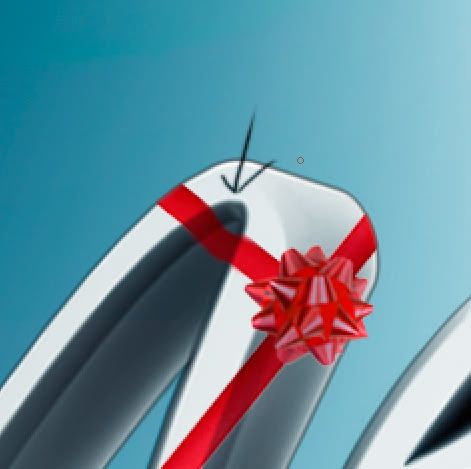
Now we can duplicate this layer, hide the original and turn the new duplicated layer into a clipping mask for our text layer. To do this with the text layer selected hold alt and click the line between the text layer and the bow layer. Now only parts of the bow, which are on the text are visible. Once this is done slide the bow around until only part of the ribbon is showing like I have done in the below screenshot.

Now duplicate this layer a few more times and move them around so it appears as if the ribbon is sliding up the letter. Once you have done this enough times unhide the original, remove the ribbon and place the bow on the text, since we want the entire bow visible a clipping mask is not required for this step.

You can add this were ever you like, I added another set up top on the merry text as well, but this time I left out the bow.

Our document now looks like the below screen shot.

Now we can head back over to SXC and grab another bow and repeat the process. The new bow can be found at : http://www.sxc.hu/pic/l/n/na/nazreth/1063045_72610999.jpg

This time however we don’t need a clipping mask, just remove the white and any ribbon parts you don’t need and place.

As you can see mine goes into one of the ‘holes’ in my letters, I pushed this section of the ribbon down to create a sense of perspective using the smudge tool. If your bow does this as well I would suggest you do the same so it does not appear flat.
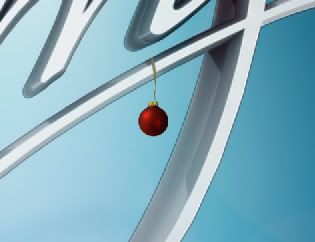
Now we can grab our first ornament, which like the previous stock images is also on SXC. http://www.sxc.hu/browse.phtml?f=download&id=1071454
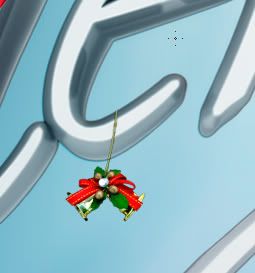
Just simply isolate this out and place it so it appears as if its going into or under one of the letters.

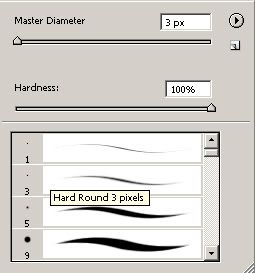
Once you have done that you can if you want create a string that wraps around the letter. To do this just select the color of the string in the stock image using you eye drop tool and then grab the 3px hard brush and simply draw a line.
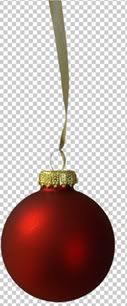
Now we can grab our next ornament. It is located at http://www.sxc.hu/pic/l/l/li/lizbethone/744367_86764146.jpg

Just isolate this out and repeat the above process for placement. However this time if you want change the hue to red so it does not blend in too much with the blue background.
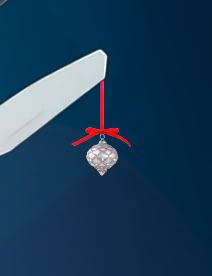
Once you have placed your ornament you can use the previously discussed clipping mask technique to apply a small ribbon along the letter so it looks like the ornaments ribbon has been wrapped around several times.

The next ornament can be found at http://www.sxc.hu/photo/744365
Again, just isolate this stock out and place it. If you like adjust the hue with the hue and saturation editor. This time, don’t worry about the ribbon effect just place it as I have in the below screen shot.
Step 4: Ornaments continued, lights added and various other stocks
Now we can head over to Deviantart and grab a pack of pre isolated stock orbs provided by the wonderful redheadstock aka obsidianDawn.com. Again, they are providing a free resource which is of great quality so a big thank you to them.
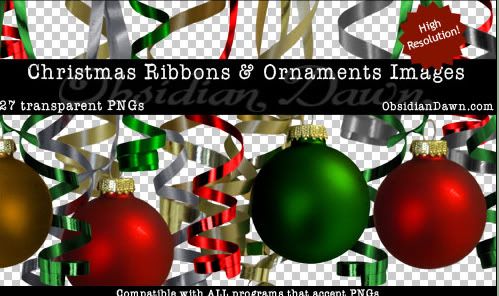
Once you have downloaded the pack you will notice that they are all transparent pngs, so no isolation is necessary! Which will be a huge help to us time wise, so again, a huge thank you to the obsidianDawn.com crew. Once you have opened it up choose a ornament you like and place it as you see fit.
Now continue on adding in more ornaments from the pack as well as any you find on the web. I will be using one of the ribbons and about three ornaments from the obsidian pack and the rest is from SXC as well as Shutterstock. Take your time when placing these stocks as they are very key to the design of the piece. Various ornament stock images:
- http://www.sxc.hu/browse.phtml?f=download&id=1071454
- http://www.sxc.hu/browse.phtml?f=download&id=744367
- http://www.sxc.hu/browse.phtml?f=download&id=212637
- http://www.sxc.hu/photo/744365
- http://www.sxc.hu/photo/604738
- http://www.sxc.hu/browse.phtml?f=download&id=212637
- http://www.sxc.hu/pic/l/l/li/lizbethone/744367_86764146.jpg
My document now looks like the below screen shot.

Now, to help out with depth you can take a large ornament and place it in one of the corners and apply a Gaussian blur. I used a red one found on SXC and applied a Gaussian blur with a radius of about 10. Once that is done, you can do the same thing with a few small ornaments or even with some of the ribbon from the stock pack.

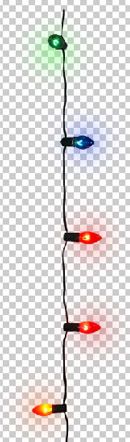
Once you have created some depth with the blurred ornaments we can head back over to Deviantart and grab another redheadstock/Obsidiandawn.com pack. This time it’s Christmas lights.

The wonderful pack can be found here: http://redheadstock.deviantart.com/art/Christmas-Lights-PNGs-106685197 Once you have opened it choose your favorite and place it.
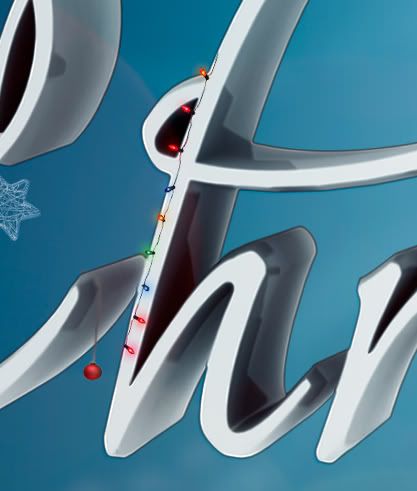
As you can see in the below screenshots, mine all go off the sides at the end of the strand. This is something you want yours to do as well, the strand should not appear as if its dangling freely, it will create a flat appearance and this is not something we want to happen.
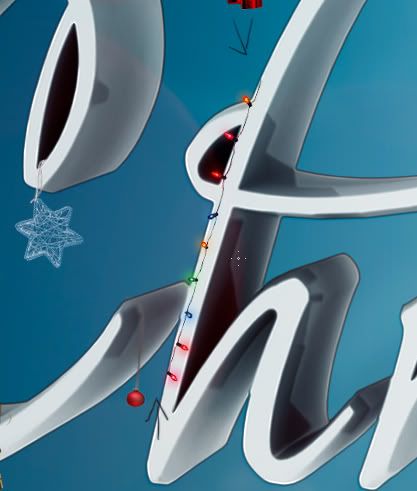
Now, let’s say you wanted to use one of the light strand on one of the loops of your letters, this can easily be achieved. Just simply past in the strand and open up your liquify filter. Once the filter has opened, use the forward warp tool to push the middle of your strand down, thus creating a curve.

Now continue applying the light as you see fit. Remember though that you can make them appear like they are drooping with your liquify filter.


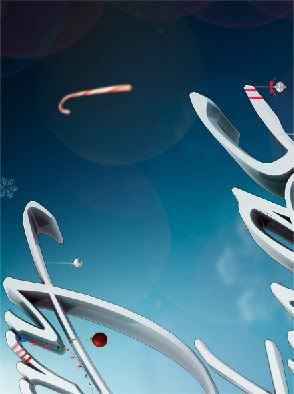
Our document now looks like the below screenshot.

Now we can add in some candy canes. The candy cane is located at: http://www.sxc.hu/browse.phtml?f=download&id=374311
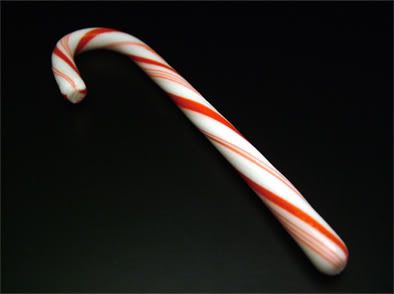
Just isolate this candy cane out and place it on your text. Put it upright so it appears as if it is hanging, then erase the section that covers over your text to finish the illusion.


Now you can throw some candy canes to the sides and blur them as we did with the ornaments.
And now we are done. I added in a few extra bits, a glowing star, Santa hat and a tiny present, all of which is located on SXC, and then just sized it down. The final image looks like the below screen shot.
No comments:
Post a Comment