Step 1:
Here are the settings for our PSD file in this tutorial.
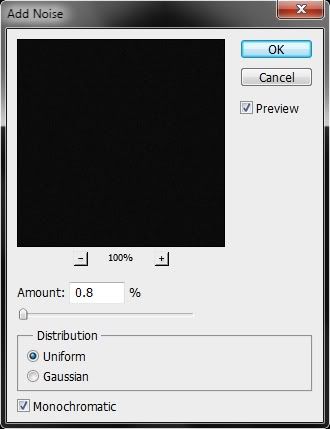
Noise settings:
Amount: 0.8% | Distribution: Uniform | Monochromatic: Checked
Step 2:
Add the text “Tech” in the center. I used the font Slicker. The Slicker font can be downloaded in this link.
Here are the settings of the Tech texts in the Character palette:
Font size: 462.21 | Tracking: -64
Step 3:
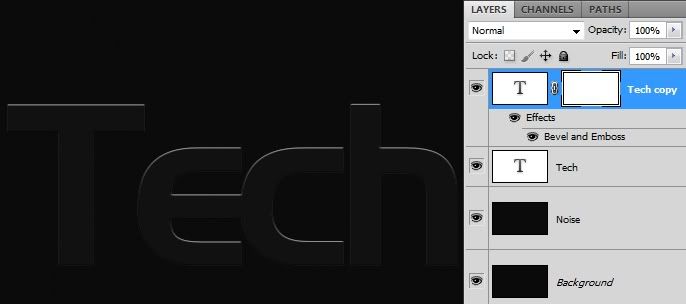
Duplicate the “Tech” layer so you’ll have “Tech copy” layer (the duplicate should be on top of the original Tech layer), change its font color to #111111 then apply Bevel & Emboss on the “Tech copy” layer.
Bevel and Emboss:
Depth: 1000%| Size: 0 | Soften: 0
Other settings are just from default.
Step 4:
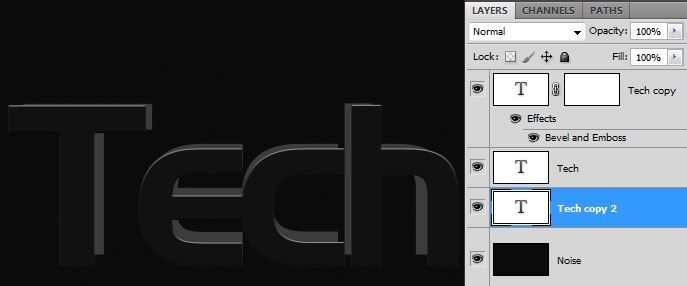
Once again, duplicate the “Tech” (original Tech layer) layer so we’ll have “Tech copy 2” layer but this time put it below the Tech layer, then resize it down to 433pt after that, move it up a bit.
See the image below:
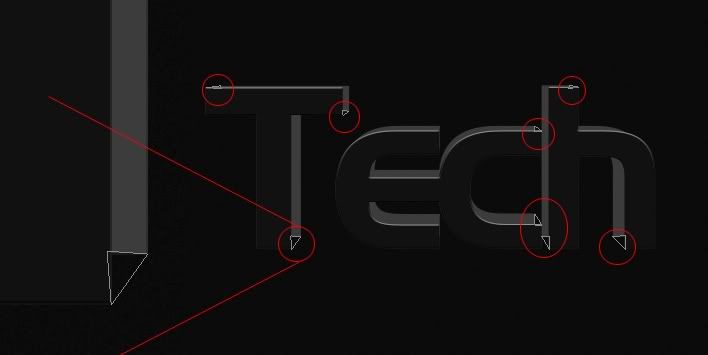
But as you can notice, we have the edges open. We can close those edges by simply using the Pen tool to draw some shapes that would eliminate those open edges.
See the image below as reference:
After drawing the shapes with the Pen tool, right-click anywhere on the canvas using the Pen tool then select “Make Selection”. Set the feather radius to 0px.
Then in the Layers Palette, be sure that the “Tech copy 2” layer was the active layer then fill up the selection with the Paint Bucket tool using the same color of the “Tech copy 2” layer’s text color #3c3c3c.
Note: Photoshop might warn you when you try to fill up a selection if the selected layer in the layers palette was a type layer; it tells that the type layer would be rasterized and the texts would no longer be editable. Just press ok then continue filling the selection with the Paint Bucket tool.
After filling up the selection with the Paint Bucket tool, deselect the selection by pressing CTRL+D on your keyboard or go to Select -> Deselect. You should now have a result similar to the image below:
Step 5:
Add Drop Shadow on the “Tech copy 2” layer.
Distance: 0px | Spread: 0% | Size: 4px
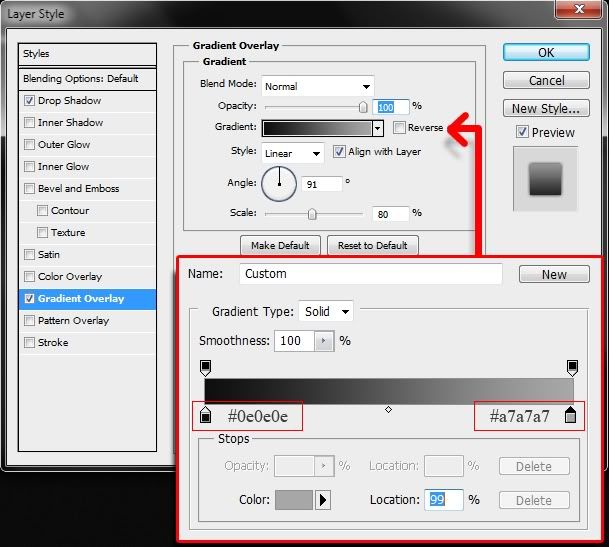
And a Gradient Overlay. See the image below for the settings:
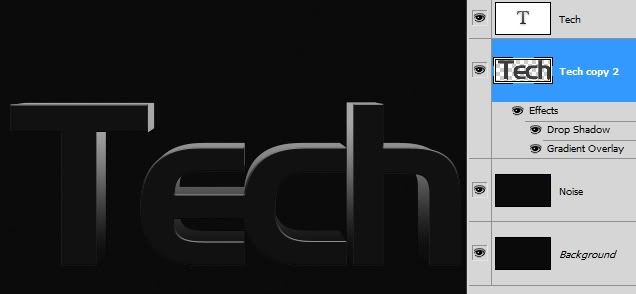
After applying the styles above, you should have a result similar to the image shown below:
Step 6:
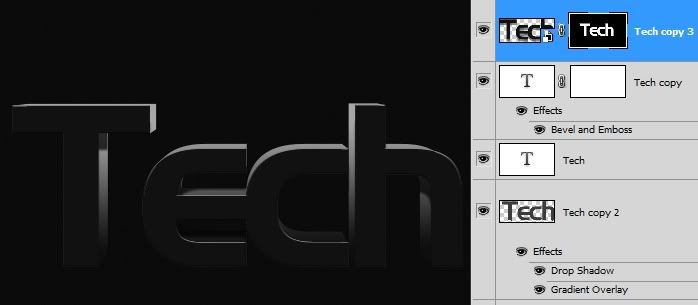
Duplicate “Tech copy” layer (the one that is above the original Tech layer) so we’ll now have “Tech copy 3” layer then add Drop Shadow on it.
Drop Shadow:
After adding the Drop Shadow, convert the “Tech copy 3” layer to a Smart Object by right-clicking the layer then selecting “Convert to Smart Object” in the menu that would appear.
Then after that, press CTRL + Click on the thumbnail of the “Tech copy 2” layer to make a selection based on its opacity and/or shape (alpha channel) and while the “Tech copy 3” layer still the active layer, go to Layer -> Layer Mask -> Reveal Selection or you can just simply click the Add Vector Mask button beside the Add a layer style (fx) button in the layers palette to add mask.
Step 7:
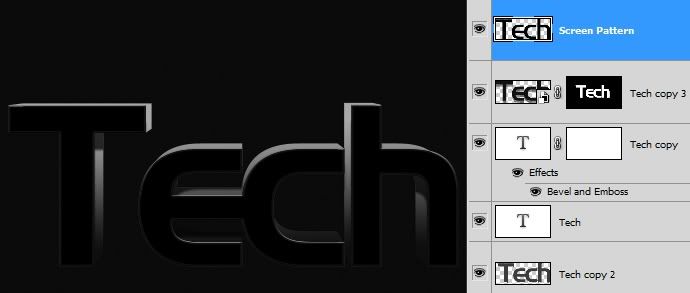
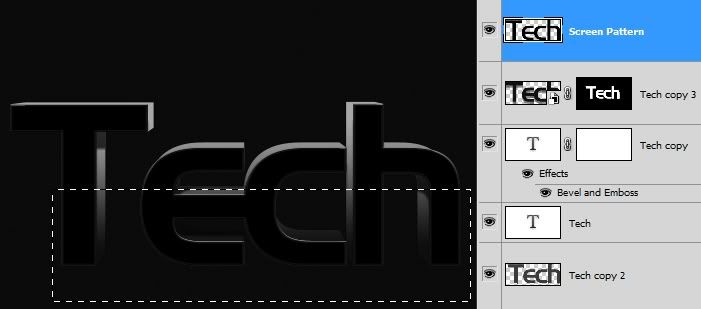
Press CTRL + Click on the thumbnail of the “Tech layer” just like we did in the previous step but this time we are not going to do masking, instead we are going to use the selection in a different trick. So as the selection still on, create a new layer on top of the “Tech copy 3” layer; rename the new layer as “Screen Pattern“; while the “Screen Pattern” layer as the active layer, go to Select -> Modify -> Contract. Contract the selection by 4px then use black color to fill up the selection with the Paint Bucket Tool. After that press CTRL + D on your keyboard to deselect the selection.By now you should have a result similar to the image below:
Step 8:
Using the Rectangular Marquee Tool (CTRL + M), create a rectangular selection for about more than the half of the lower part of the “Screen Pattern” layer. See the image below as a reference.
Then press Delete on your keyboard to trim the layer.
Step 9:
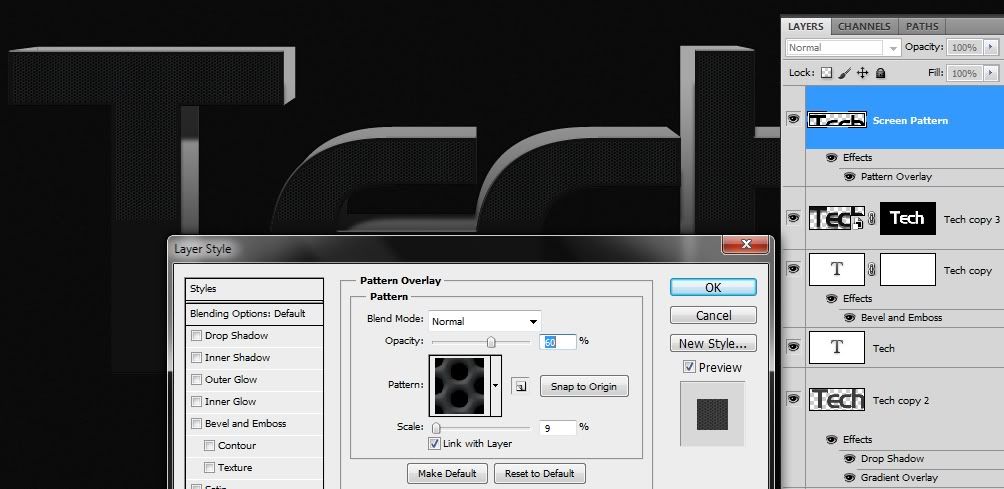
Add the Metal Screen Pattern Overlay on the “Screen Pattern” layer.
Opacity: 60% | Scale: 9%
Metal Screen Pattern by jbenr can be downloaded here.
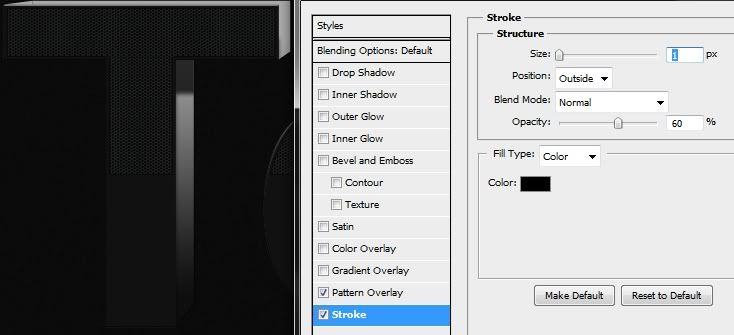
Then I added a Stroke:
Position: Outside | Size: 1px | Opacity: 60% | Color: Black:
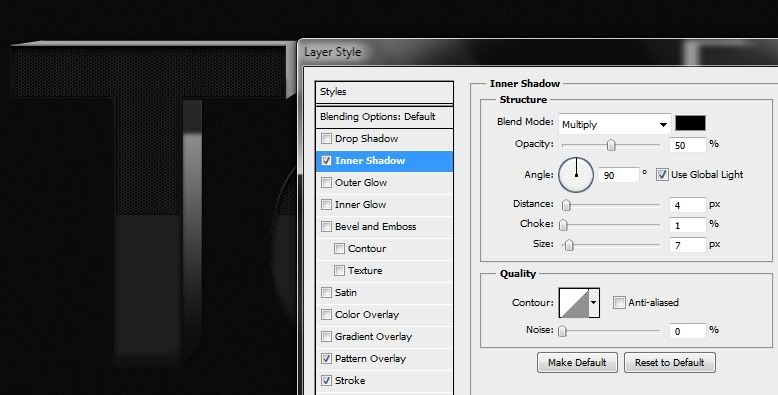
And an Inner Shadow:
Opacity: 50% | Distance: 4px | Choke: 1% | Size: 7px
Step 10:
In this step, create a new layer on top of the “Screen Pattern” layer (so we now have another layer named “Layer 1” in this tutorial) then do the same trick we did in Step 7-8 but this time trim it on its top portion and change the Contract value to 7px.
See the image below as reference in the result.
Step 11:
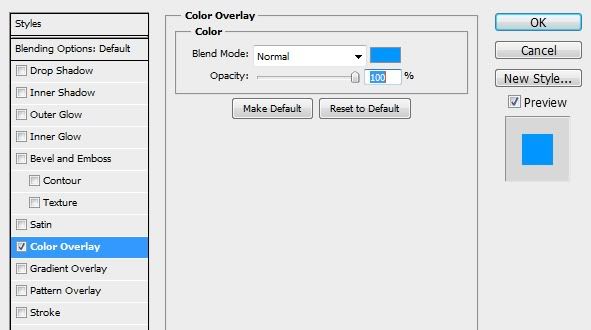
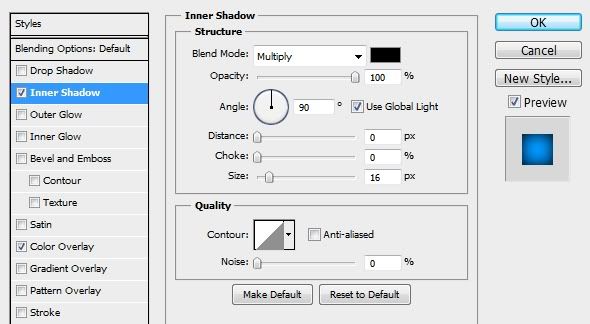
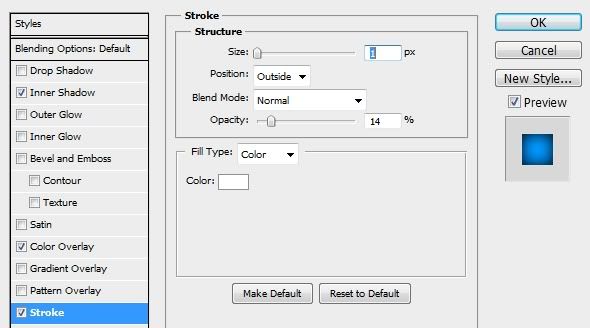
Add some Styles on the “Layer 1“.
Color Overlay:
Color: #0096ff | Blend Mode: Normal
Inner Shadow:
Distance: 0px | Choke: 0% | Size: 16px
Stroke:
Size: 1px | Opacity: 14% | Color: White
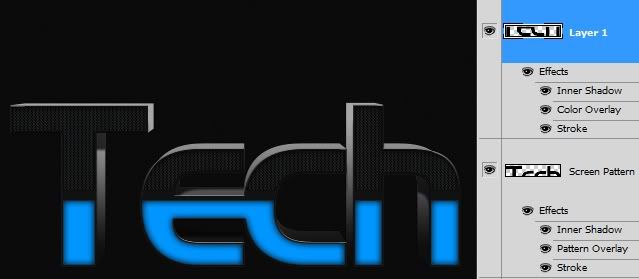
After applying all the settings above, you should now have a result similar to the image shown below:
Step 12:
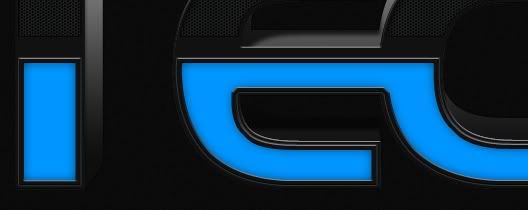
Create a new layer on top of “Layer 1” (Then we’ll have “Layer 2” as the newest layer). Then press CTRL + Click on the thumbnail of “Layer 1“. While “Layer 2” as the active layer in the layers palette, fill the selection created with black using the Paint Bucket Tool. Don’t deselect the selection yet, instead go to Select -> Modify -> Contract. Contract the selection by 5px then press Delete on your keyboard to delete the fill inside the selection. Now you can deselect the selection by pressing CTRL + D on your keyboard.
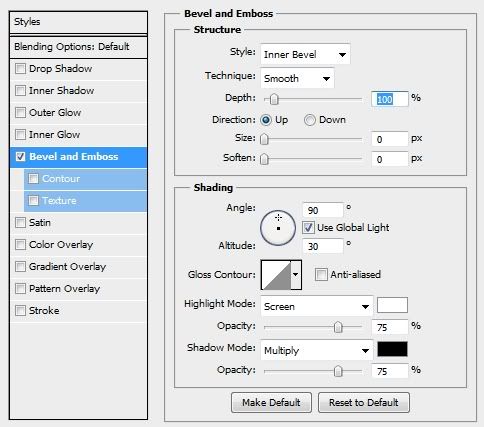
Then after that, apply Bevel and Emboss on “Layer 2“.
Depth: 100% | Size: 0px | Soften: 0px:
See the image below as reference on the result.
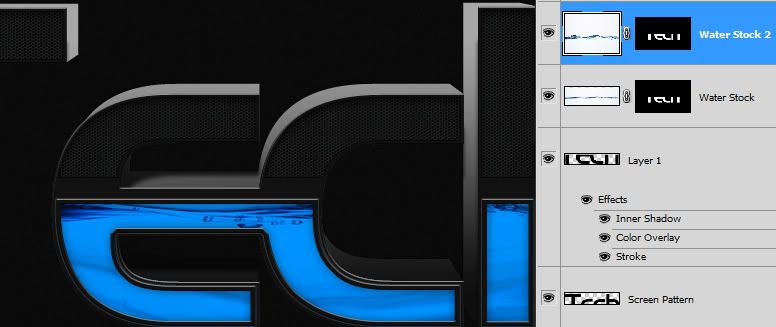
Import the Water stock and place it on top of “Layer 1“, resize it down then mask it out with the shape of “Layer 1“. To get rid of its white background, set its Blend Mode to Multiply.
I had imported the water stock once more but I didn’t resized it then mask it out the same as the first “Water Stock” layer mask by simply pressing ALT + dragging the mask of “Water Stock” to the 2nd “Water Stock 2” layer and then reduced its Opacity to 25%.
Take a look at the image below as a reference on the result.
Step 14:
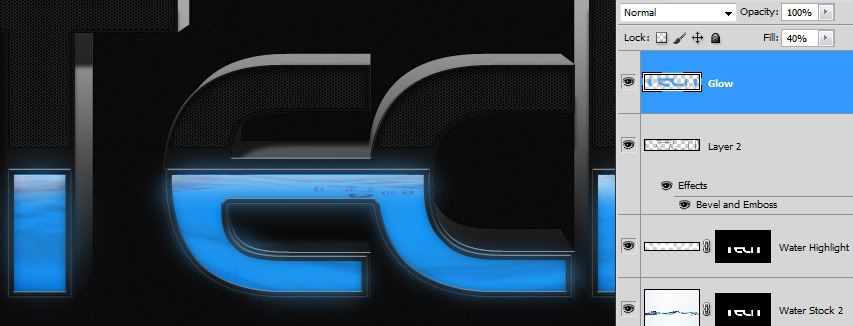
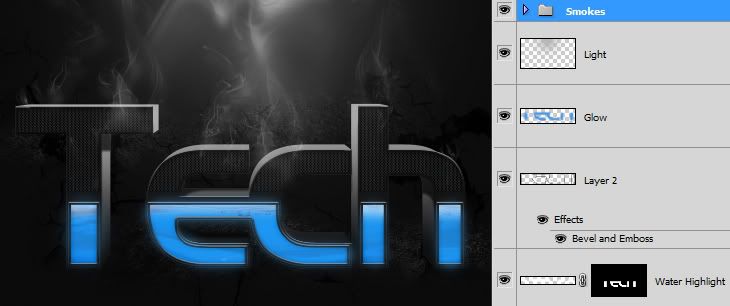
Create a new layer (rename to “Water Highlight“) on top of “Water Stock 2” layer then we could add some highlights on the top portion of the water container looking thing with the soft round brush for about 60px and foreground color of white then mask it out with the same mask we used with “Water Stock” layer.
Step 15:
Create a new layer (named it “Glow in this tutorial“) on top of “Layer 2” then use it to add a little Glow on our water container looking thing with the Soft round brush for about 60px size and a color of #0096ff (Sky Blue maybe) then reduced the layer opacity to 40%.Step 16:
Add some wall texture on the background on top of the “Noise layer” then mask the unwanted parts. These wall texture images that I used were downloaded from Stock Exchange.
You can de-saturate the color of the texture by selecting the layer then go to Image -> Adjustments -> Hue & Saturation (set the saturation slider to -100 or it’s up to you). Then you can also apply a little bit Levels adjustment to darken it up.
Step 17:
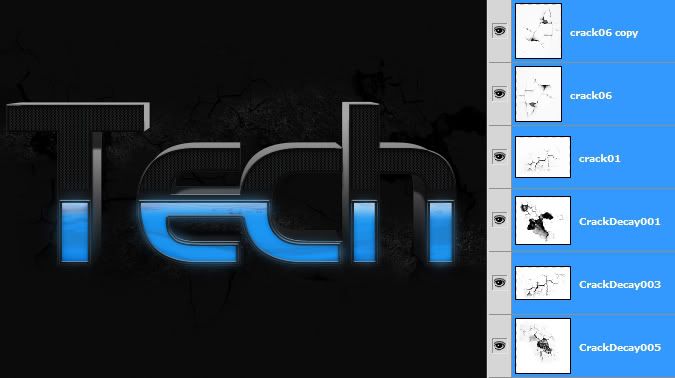
We could add some crack images on the background as well. These crack images that I used were downloaded from deviantart.com (stock images by funeralSong) the file includes images with white background and a Photoshop brush file.In this tutorial, I used the images with white background and I placed them on top of the “Wall Texture copy” layer. You can just set the layer Blending mode to Multiply to get rid of the white background.
Step 18:
Add new layer (named “Light in this tutorial“) on top of all the layers then use the soft round brush to create a light effect.
Soft round brush settings:
Size: 800px | Foreground Color: #b6b6b6 (light gray). | Layer Opacity: 35%
Step19:
Add some smokes brush for additional fx. Smokes brush can be found here.
Step 20:
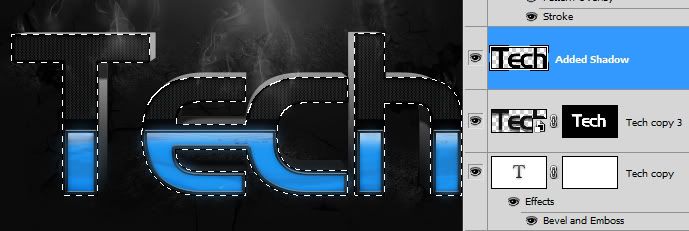
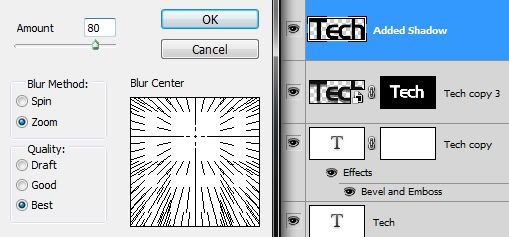
I added some shadowing fx by creating a new layer (named “Added shadow“) on top of the “Tech copy 3” layer then made a selection by the shape of the the “Tech layer” (same technique done in Step 7-8) then filled the selection with black using the Paint Bucket tool.
Amount: 80 | Blur Method: Zoom | Quality: Best
See the image as a reference for the Blur Center:
Then you can duplicate the layer then merge them, and you can also erase some unwanted parts or just use masking.
Step 21:
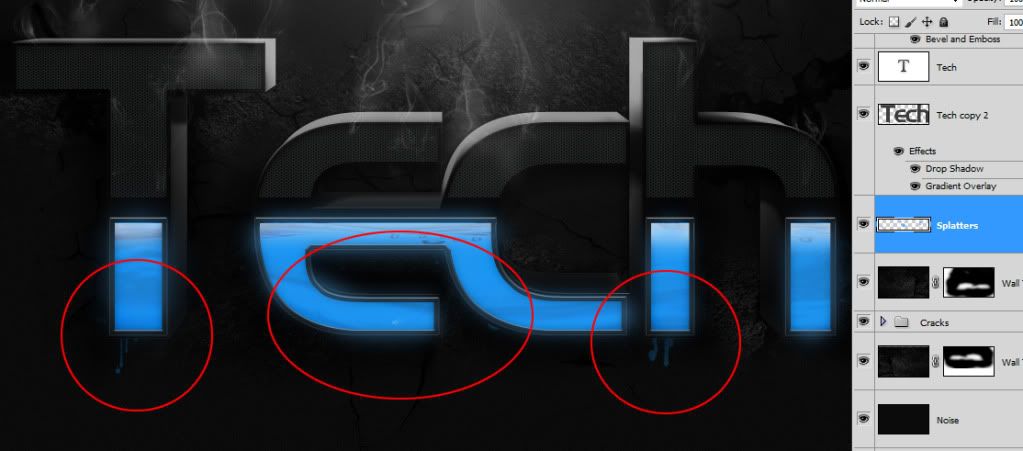
I added some splatters brush at the back of the Tech. The splatters brush can be found in deviantart.com. Brush pack by KeRen-R.
Step 22:
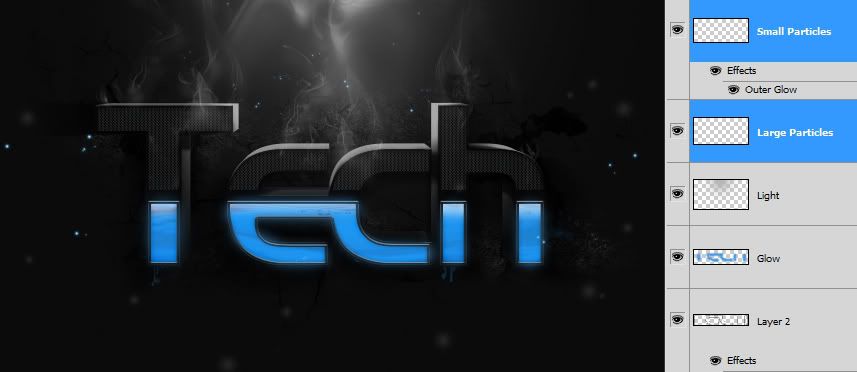
To add more elements, I used the Soft round brush to create some particle looking fx.Large Particles Brush settings:
Brush size: 25px | Spacing: 300% | Shape Dynamics – Size Jitter: 100% | Scattering – Scatter: 1000%
Small Particles Brush settings:
Brush size: 10px | Spacing: 300% | Shape Dynamics – Size Jitter: 100% | Scattering – Scatter: 1000%
Then apply Outer Glow style to the “Small Particles layer“:
Color: #0096ff | Opacity: 100% | Size: 5px
Step 23:
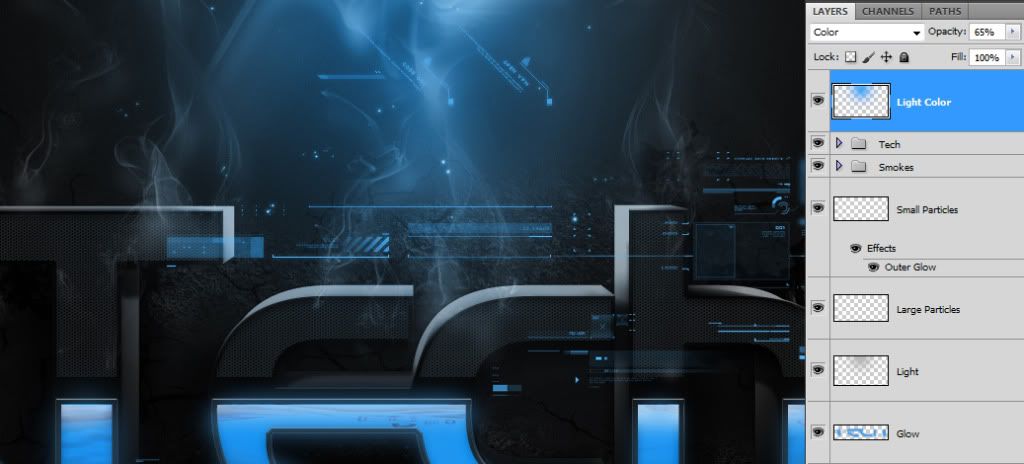
Add some Tech Brush to improve the overall appearance of our design. The Tech brush can be found on deviantart. Tech Brush stock by Z-Design.And also, you could also apply color on the Light effect that we did in Step 18 by using the Soft round brush for about 700px size and Foreground color #0096ff.
Thank you very much for having some time reading my simple tutorial. Good luck! And have a good time.
Final Result: 3D Tech Style Text Effect:













Nice....
ReplyDelete